Wednesday, February 27, 2013

DIY Floating Shelves for $30!

I absolutely LOVE gallery walls and all the possibilities that come along with them. I, however, do not love the idea of putting a bunch of holes in the wall (especially since I change my mind often and detest filling nail holes). I found some ideas on Pinterest for using shelves to create a gallery wall. Ana White's floating shelves (featured on Young House Love) are beautiful but I wasn't sure I would be able to convince Jason to take on the project. The postcard ledges that Young House Love recently featured were closer to the project I thought we could handle but they were just a little small for holding picture frames. I found these shelves on Save It For a Rainy Day and loved the size of them, much closer to the idea I had in my head.

Luckily, Jason's dad is pretty handy, especially when it comes to woodworking so he had some ideas on how we could make exactly what I wanted without spending a ton of money. Here is what we decided to do:

The first step was deciding how many and how long we wanted the shelves to be, we had a pretty big wall in the living room to fill. We used painter's tape to plan out the shelves.


I left enough room on the height of the shelves so they could all fit an 8x10 picture frame and I left enough room under the shelves for eventually putting a bench or table on that wall.

We ended up with 6 shelves:
  • 1'6"
  • 2'
  • 2'
  • 3'
  • 4'
  • 4'6"
We went Lowe's to buy rough cut 2x6 boards, plus a few extra feet just in case. The hardest part was finding boards that were relatively straight. Jason cut the boards to the lengths we needed for the shelves.

Jason and his dad then routed out key hole slots in the back of the shelves for mounting. We tried to space them out so they would hit studs in the wall and ended up with 2-4 key holes depending on the size of the shelf.

They also used a router with a V-shaped bit to put a groove in the top of each shelf for frames to sit in to make sure they wouldn't fall off. Last, they used the router to round off the edges of each shelf (so they would look a little less like 2x6's hanging on the wall).

Then, I got to work on sanding each shelf with a palm sander.

 Before staining them, we put the drywall screws in the wall. To hang them, we used a level to make a straight line across the painter's tape and mark where each key hole was on the wall.

About 90% of the key holes lined up with studs. Each shelf hit at least 1 stud and the long shelves all hit at least 2. They are pretty sturdy, good for holding frames. I wouldn't recommend pulling or hanging on them (obviously).

I got to work staining the shelves. We went back and forth on either painting them black or staining them dark and finally decided on on stain since all the frames were going to be black.


I used Minwax Gel Stain in Red Elm. This stain was pretty easy to work with, especially for what we were doing. The hardest part was stirring to make sure all the chunks were out. I used a foam brush to apply, waited 24 hours between each coat, and did 3 coats to get the dark color I wanted.


The final coat took 3 days to completely dry before we were able to hang them on the wall. Then FINALLY..


I LOVE LOVE LOVE how them came out. We need to get more frames up there to fill them out but this is exactly what I was hoping for. 
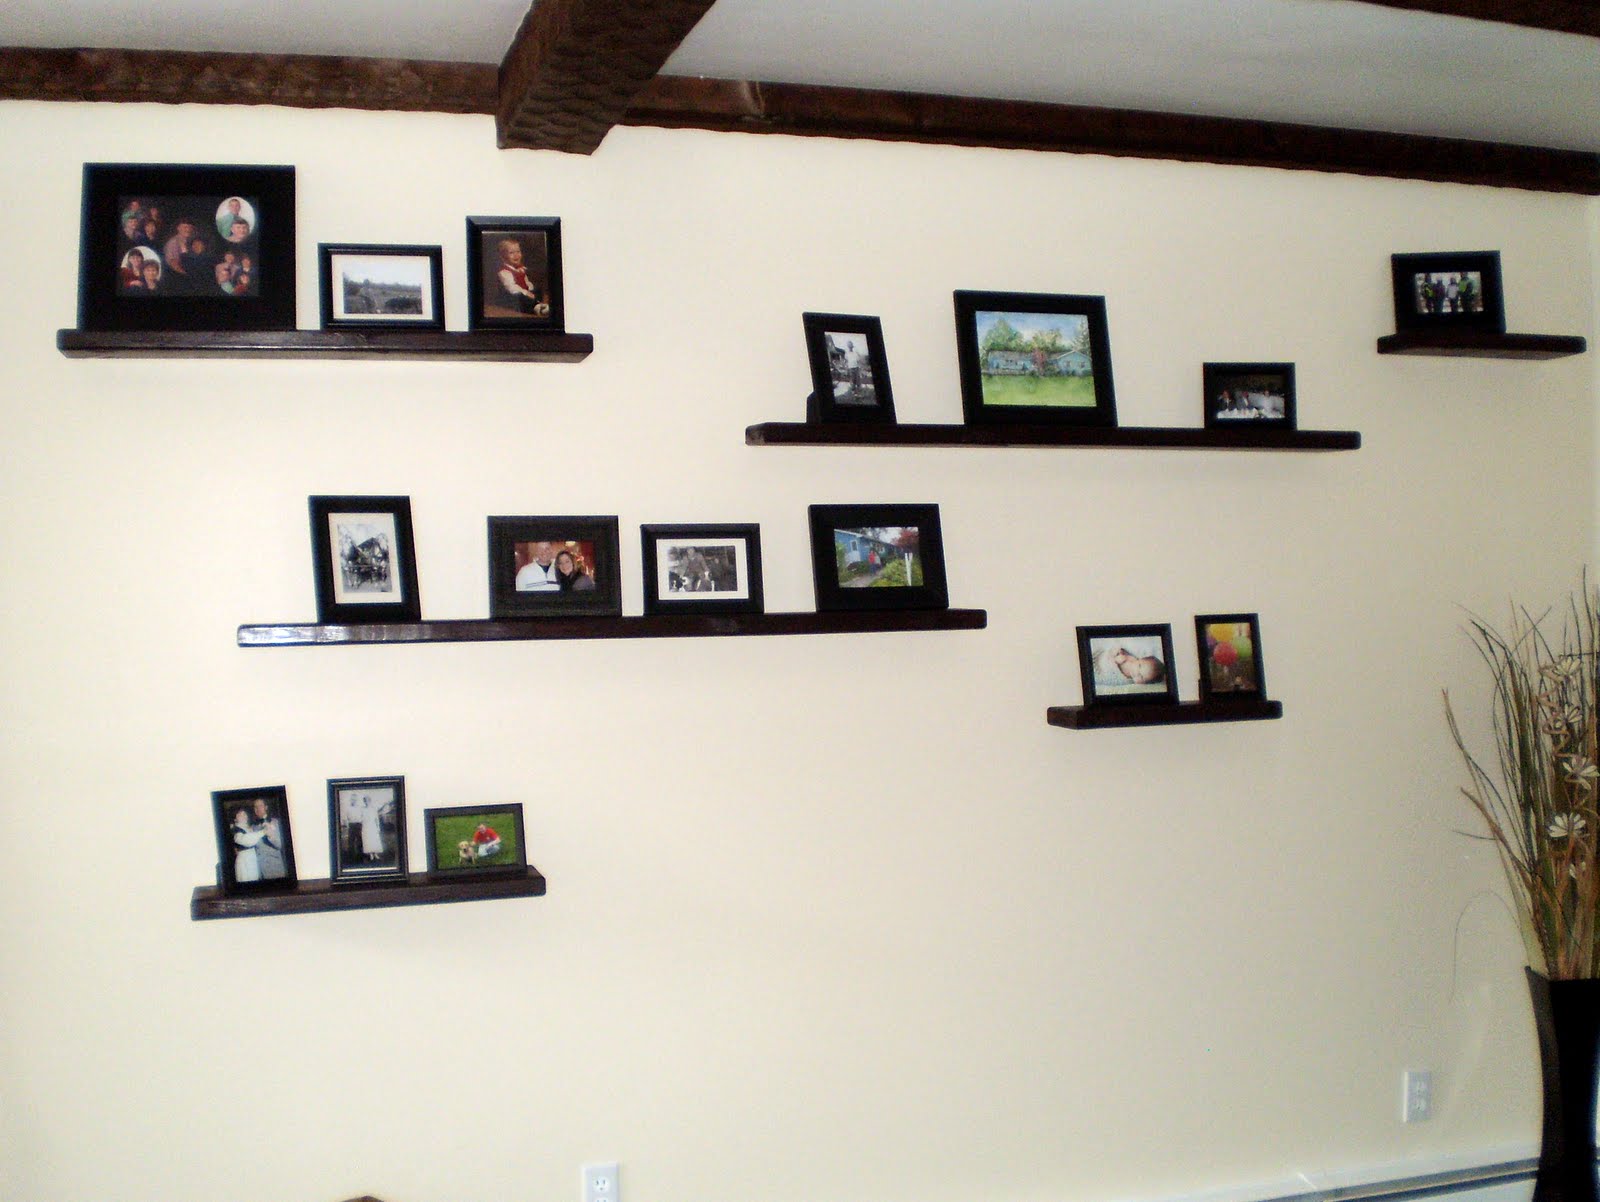

Total cost of this project: $30!!

And finished just in time for the Pinterest Challenge hosted by Young House Love, Bower Power, The Remodeled Life, and Decor And The Dog.

Saturday, February 9, 2013

Canvas Art

When we moved into the house we were in need of some cheap art for the walls. Pinterest is full of ideas for DIY canvas art, so that is what I did!

First, I did chevron art for one of the spare bedrooms inspired by this link.


I didn't get any in-progress pictures of this project but I used 2 different sizes of painter's tape and a square to make the angles. I painted the purples on with a foam brush and used acrylic paint. If you look closely, the lines aren't perfect but they look great in the room.

Here they are hanging in the bedroom. 

For our bedroom, I used this link as a guide to make another canvas. 

I'm very bad at getting photos during projects apparently. But I used thick painter's tape and a level to get the lines relatively even (similar to the picture above). Then I used a foam brush and acrylic paint to paint the entire canvas. I was careful around the edges of tape so the paint didn't bleed through.

The final project hanging above our bed.

I did one more set of canvases for my mom for Christmas. I liked the flower idea from this blog but needed something bigger because the wall my mom plans on putting it on is large. First I painted both canvases with acrylic paint and the cut a ton of ovals out of scrapbook paper using an oval punch (this saved a ton of time). I laid out what I wanted the flower to look like then started to glue the petals down starting at the center and working my way out. At the end, I went over the top with modge podge to seal it all in.


These will hang side by side in an extra bedroom at my mom's house. 

I have 2 canvases left from the multi-pack I bought so I'm trying to figure out a plan for them. One is going to hang on the other side of the bed, I just have to decide what I want to do with it.

Friday, February 8, 2013

Meet Oakley

It has been over a month since I have posted but life has been crazy! We got a puppy. 

Hi. I'm Oakley.

Oakley is a Westie Poo puppy who just turned 3 months old. He does a lot of sleeping but when he is awake he LOVES to play with Gauge (our yellow lab). 


Oakley and Gauge.

His sharp new coat.


My co-pilot.

More sleeping. In a crazy position.

 Hopefully blog posts will be a little more frequent now that he is getting settled and house trained.

Saturday, January 5, 2013

What we're up to

We are still here! And still plugging away at projects around the house. The holidays were very busy so I have gotten a little behind on posting.

Here is a quick look at SOME of the projects we are currently working on.

1. Curtains.
This is a curtain that I made for above the sink. I'm so glad this fabric didn't work out for my cousin because I think the yellow adds a pop of color to this room. I am currently sewing a curtain for the half bath and plan to alter a panel we purchased for the living room.

2. Cleaning the basement. No pictures of this yet. But it has been quite the project. We vacuumed the entire basement, rearranged everything, and Jason hung wood on one wall for a dart board. It is still a work in progress.

3. Gallery wall. I have been saving a large wall in the living room so I could create a gallery wall and we have started it! It is not a "true" gallery wall but more like staggered floating shelves with a lot of pictures on them.

This is our rough template for where the shelves will go. No they are not anywhere close to exact or level but we wanted to get a general idea so we could figure out how much wood we needed. One thing we have learned so far: the outside walls in this house are impossible to find studs in! More on that later.

Happy New Year and I hope to be caught up with posting soon!

Tuesday, December 25, 2012

Merry Christmas!

Merry Christmas!

 We hope everyone enjoyed their day with family and friends.

Love,
Cortney & Jason

Monday, December 10, 2012

Christmas!

We are all ready for Christmas here at our house. We got the lights put up outside...

Our first Christmas tree trip turned into quite the adventure... we went to Jason's family's land to cut down our own tree and ended up with a 10 foot tree that we planned on cutting down to fit in our house. It ended up being a 5 foot tall Christmas bush that looked like this.

It was pretty bad. So we headed to the mall parking lot and picked up one that fit perfectly in our living room, no cutting required.

I put this bucket together because I needed something tall for the fireplace. It came together pretty nicely for only $15 (plus scraps from our Christmas bush).

Sorry for the blurry iPhone photo.

Merry Christmas!

Sunday, December 2, 2012

Pinterest Projects

I was brave enough to attempt two decorating ideas from Pinterest for Christmas this year: the ruffled tree skirt and felted trees.

The first is a ruffled tree skirt, here is the link to the idea from Done Over Decor.  I forgot to take pictures along the way but I used some red felt I had to make a tree skirt template Then I cut and hot glued strips of red fabric and burlap around the felt circle.


The other Pinterest project I attempted was felt pine trees from The Crafted Sparrow (link). These were pretty time consuming but something I could mindlessly do while watching TV.
In Progress

 Here is the final product (I apologize for the blurry cell phone picture).

We are all decorated for Christmas here, I can't wait to show everyone!