I have sewn 3 curtains for our house so far. Two of them were fairly easy and the other one ended up being quite the task.
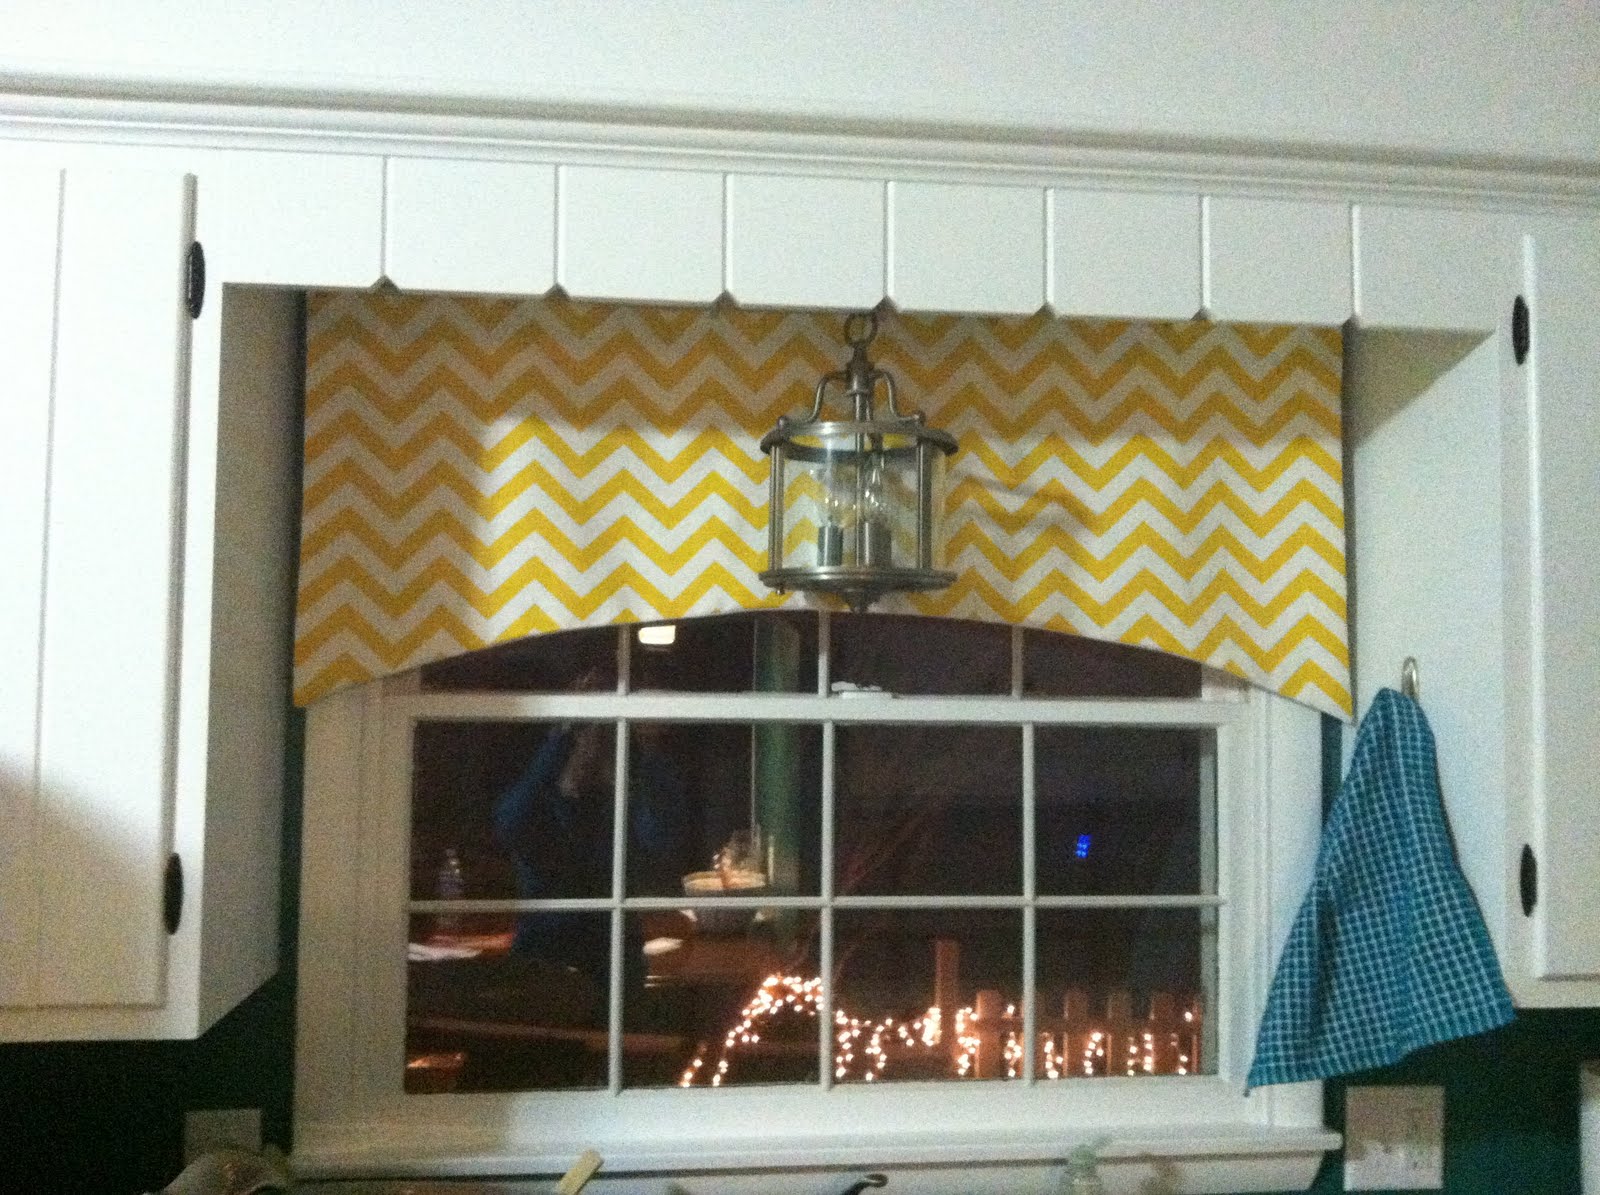
The first curtain I made was for the kitchen window over the sink, I wanted to add a bright pop of color to the white cabinets. The yellow chevron fabric my cousin bought but didn't use ended up working out perfectly.
My aunt has had the pattern for this curtain for years. It is cut out on heavy paper and you can make the pattern smaller by folding it in the middle (or vice versa). We sized the pattern up to the window then cut out the fabric with some extra for 1/4 inch seam allowance. Then, I put the fabric right sides together, sewed them with a 1/4 inch seam allowance (leaving about 3 inches open at the top for turning), turned it right side out, sewed the opening closed, and that was it!
We hung it with a very simple curtain rod and clips because you can't see that part from the front anyway.
I have been searching for a yellow bowl for the table but the search continues!
In our living room we have two sets of windows. One is the big corner window that helped sell us on the house.
The other window sits back behind where we have the couch and is a much smaller window.
 |
| The window on the right in this picture (I guess that view was forgotten). |
For the big picture window, we bought panels at Lowe's. We hung them about 3 inches from the beams so they just hit the baseboard heat. There are curtains on each end and one stationary curtain in the middle. they don't cover the whole window but added some bright color to our very light walls.
For the smaller window, we wanted the same curtains but didn't want to do full panels again. So I bought an extra panel at Lowe's and made a simple valance out of it. To do this, I measured the window and cut the size out of the panel (I ended up having to turn the panel on its side but you can't really tell because it is a geometric pattern). I hemmed the edges and made a curtain rod pocket. The fabric was actually really hard to work with and kept fraying but I didn't have a choice because I wanted it to match the other windows.
Next up was a curtain for our half bathroom.
 |
| This is the best picture I have of the window. |
My mom had some fabric left over from her kitchen curtains that went along with the grey in the bedroom. We wanted a curtain that would cover the whole window if we wanted it to but also roll up to let light in. I am going to save the whole process for another post but here is how it came out and I love it. I would change a few small things but overall it came out great for a first attempt!
 |
| We added privacy window frosting to the bottom so we could still use the bathroom with the curtain up. |
Phew.. 3 down, only 7 more windows to go!